
Mastering Meta Quest 3s for Elite Sim Racing Performance
A step-by-step blueprint to elevate your VR racing setup Shifting from traditional monitor-based simulations to a truly immersive virtual...
A step-by-step blueprint to elevate your VR racing setup
Shifting from traditional monitor-based simulations to a truly immersive virtual environment requires more than just strapping on a headset. With its high-resolution LCD panels, sophisticated passthrough technology, and precise inside-out tracking, the Quest 3s is capable of transporting you directly into the driver’s seat—but only if it’s configured correctly. This detailed walkthrough will guide you through each phase of the process: preparing your PC for VR workloads, integrating the headset seamlessly with your sim rig, optimizing graphics and frame stability, calibrating controls to perfection, and fine-tuning comfort and audio settings. Drawing on empirical benchmarks, ergonomic best practices, and expert calibration routines, this tutorial empowers both seasoned racers and VR newcomers to eliminate technical hurdles so they can focus on perfecting every apex, braking zone, and throttle input across titles like Assetto Corsa Competizione, iRacing, and Project CARS 3. By the end, you’ll have transformed your Quest 3s into a responsive, high-fidelity racing cockpit that delivers razor-sharp visuals, instantaneous control feedback, and sustained comfort during marathon sessions.
Control Calibration Mastery
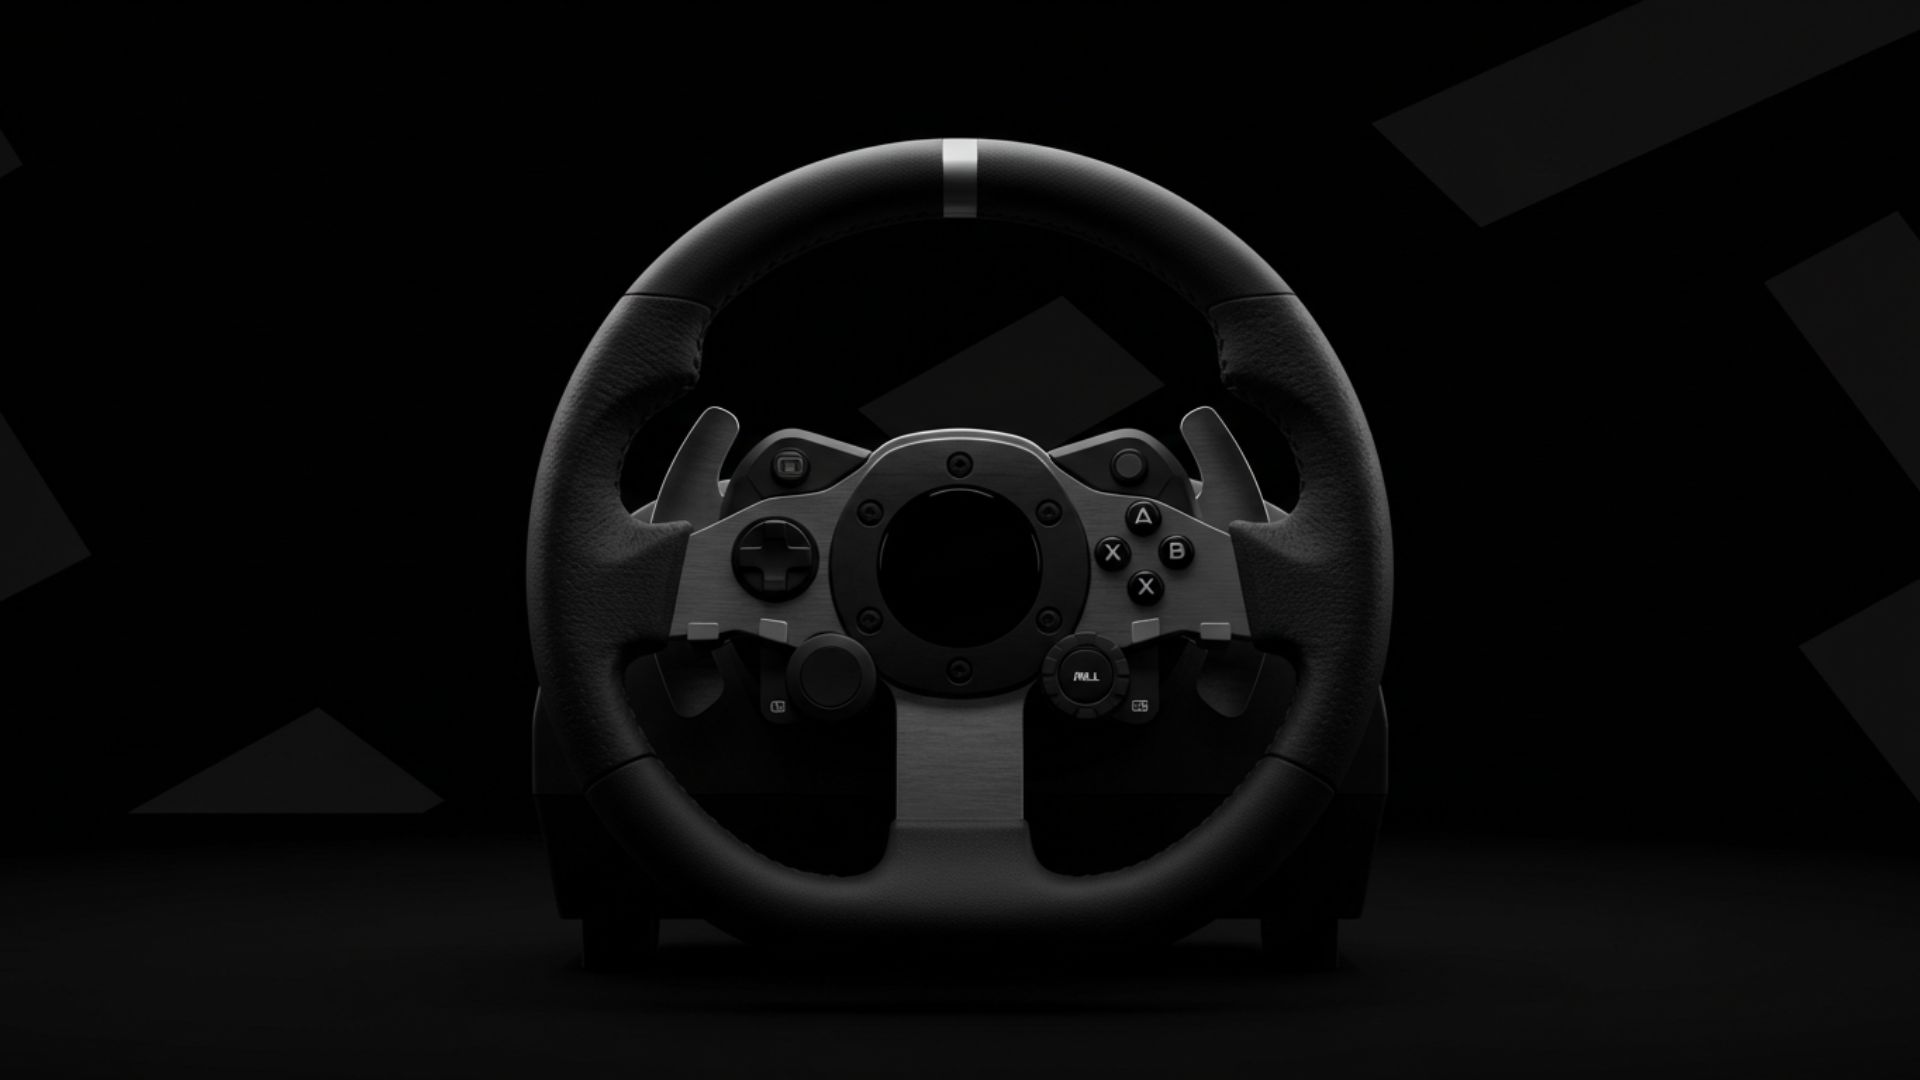
Precision Steering Wheel and Pedal Setup
Begin by installing the official driver suite—Logitech G Hub, Thrustmaster Control Panel, or Fanatec Command Center—and launch the calibration wizard. Carefully define the full range of motion for your wheel and pedals, ensuring throttle and brake inputs map linearly from 0 percent to 100 percent without dead zones or overlap. It’s equally vital to verify that the wheel returns squarely to center with minimal drift, as just a few degrees of misalignment can translate into significant steering variance at high speeds. Revisit this calibration any time you adjust belt tension or update firmware, maintaining consistency and reproducibility across all your racing sessions.
After capturing baseline values, select the appropriate steering lock preset to reflect your chosen vehicle’s real-world specifications—900° for GT machinery, 1080° for formula-style rigs, or custom angles for classic touring cars. Export these profiles into your sim’s control options and validate them by observing in-game telemetry while executing full-lock sweeps. Periodic recalibration is recommended, especially after extensive use or hardware maintenance, to prevent subtle drift that could erode lap-time precision.
Customized In-Game Input Mapping
Within each simulation’s control menu, create a dedicated VR profile and map your hardware axes—wheel rotation, throttle, brake, clutch—to their corresponding virtual inputs. Assign secondary functions like pit limiter, radio communication, or headlight toggles to your Oculus Touch buttons or paddles, reducing reliance on keyboard shortcuts and keeping your hands firmly on the wheel. Thoughtful mapping prevents accidental activations during critical maneuvers and enhances your focus to master each corner’s nuances.
For titles supporting gesture or flick-button inputs, enable quick-peek camera angles, HUD toggles, or DRS activation without removing your hands from the controls. Always conduct a validation lap after mapping changes to confirm there’s no input overlap or unintended triggers when negotiating chicanes or hairpins. Fine-tuning these bindings ensures seamless, distraction-free control throughout your racecraft.
Enhanced Haptic and Force Feedback Tuning
While your wheelbase provides the core force feedback sensations, the Quest 3s’s integrated haptics can augment immersion by translating engine vibrations and road textures into subtle headset pulses. Within the Oculus PC app, increase the “Audio Haptics” setting to amplify low-frequency cues synchronized with tire slip events and engine idle. For a fully immersive experience, pair this with a haptic vest or seat-mounted transducer to channel these signals into your torso, mimicking the physical sensation of lateral G-forces and engine rumble.
Next, access your sim’s force feedback configuration and adjust parameters such as overall gain, spring strength, and damping. Too much gain can induce wheel oscillations on straights, whereas too little can render surface details indistinct. Tweak these values iteratively during practice laps until force feedback feels in perfect harmony with your visual and auditory inputs, delivering consistent, nuanced terrain information through every turn and straightaway.
Performance and Visual Tuning
Optimal Refresh Rate and Render Resolution
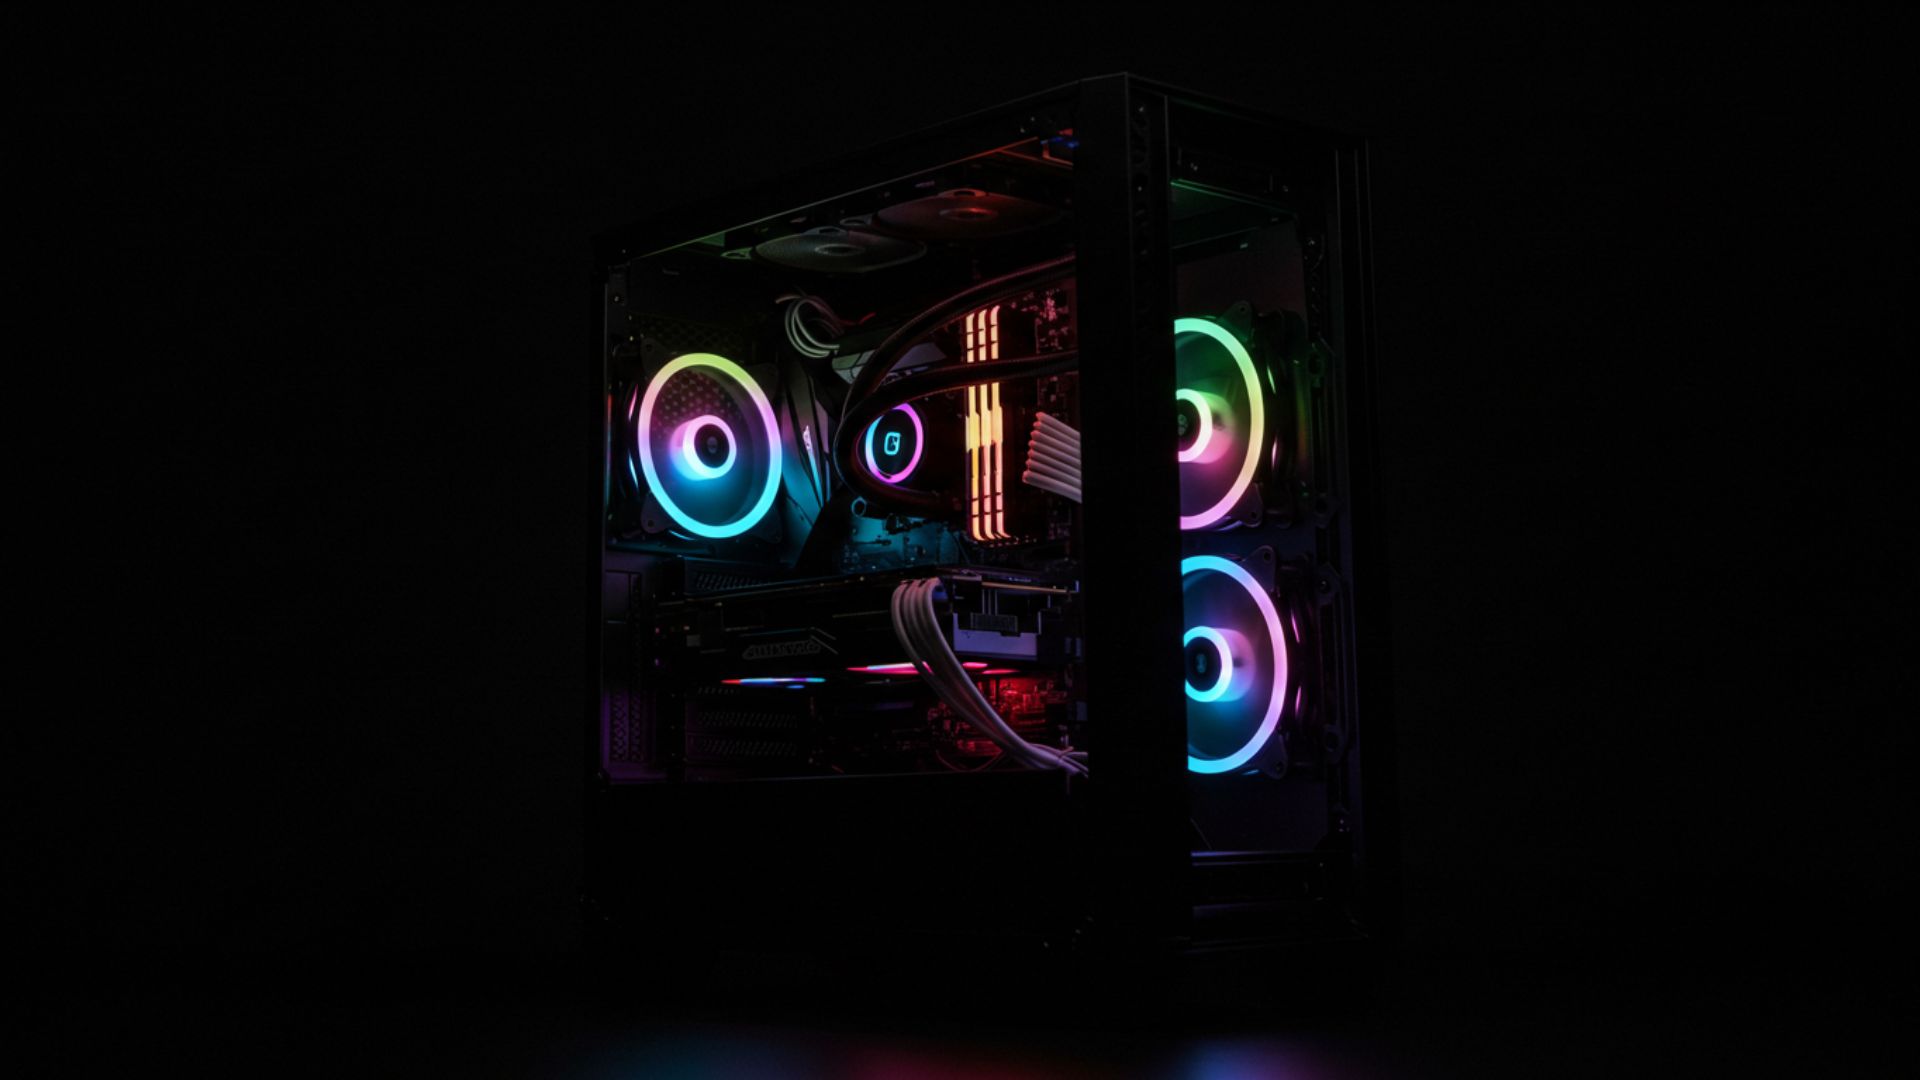
The Quest 3s supports both 90 Hz and 120 Hz refresh rates, each presenting a trade-off between smooth motion and GPU load. In the Oculus PC application, select your preferred refresh rate—choose 90 Hz for a stable performance buffer or 120 Hz for peak fluidity if your GPU can sustain it. Then adjust the Render Resolution slider to calibrate pixel density; increasing this value sharpens visuals but heightens VRAM consumption and GPU cycles. Conduct benchmark sessions in your favorite sim titles to pinpoint the highest rendering resolution that maintains locked frame rates without judder or reprojection.
If your simulation supports dynamic resolution scaling, enable it to allow the engine to automatically reduce render resolution during graphically intense scenes. This real-time downsampling preserves your target refresh rate while keeping visual fidelity high during complex environments like densely populated circuits or dynamic weather effects. The result is a consistently smooth, high-fidelity experience from the pit lane to the checkered flag.
Balancing Graphics Settings for Maximum FPS
Within each sim’s video options, strike a balance by setting textures, shadow quality, and reflections to medium or high, while moderating post-processing effects like ambient occlusion and screen-space reflections that excessively tax GPU resources. Shadows and volumetric effects often impose the greatest performance overhead; dialing these back slightly can yield substantial FPS gains. For more granular control, use the Oculus Debug Tool to override in-game supersampling or apply fixed pixel density multipliers, optimizing how VRAM and compute threads are allocated.
Monitor performance metrics closely via MSI Afterburner or the SteamVR performance overlay, paying special attention to frametime graphs rather than absolute FPS. Aim to keep GPU utilization below 90 percent, allowing headroom for sudden spikes in scene complexity—such as detailed crowd models or intense lighting transitions—without dropping frames and triggering reprojection, which can introduce perceptible latency artifacts.
Frame Stability and Motion Smoothing Strategies
Consistent frame timing is critical to prevent judder and motion sickness during dynamic head movements. If your monitor supports Adaptive Sync or FreeSync, enable it to synchronize the display refresh rate with GPU output, mitigating tear and stutter. Within the Oculus Debug Tool, activate Motion Smoothing (also known as Asynchronous Spacewarp) to reproject missing frames when your GPU momentarily falls below target refresh rates, preserving the perception of smooth motion.
For wired Link connections, disable Windows Game Mode and background optimization features to dedicate maximum CPU and GPU cores to your simulation. Terminate non-essential applications—web browsers, streaming clients, system updaters—to eliminate context-switching spikes during competitive sessions. Consider a modest GPU overclock with an optimized fan curve to reduce thermal throttling under prolonged loads, ensuring unwavering performance throughout endurance events.
Software and Connection Setup
Oculus PC App and Driver Installation
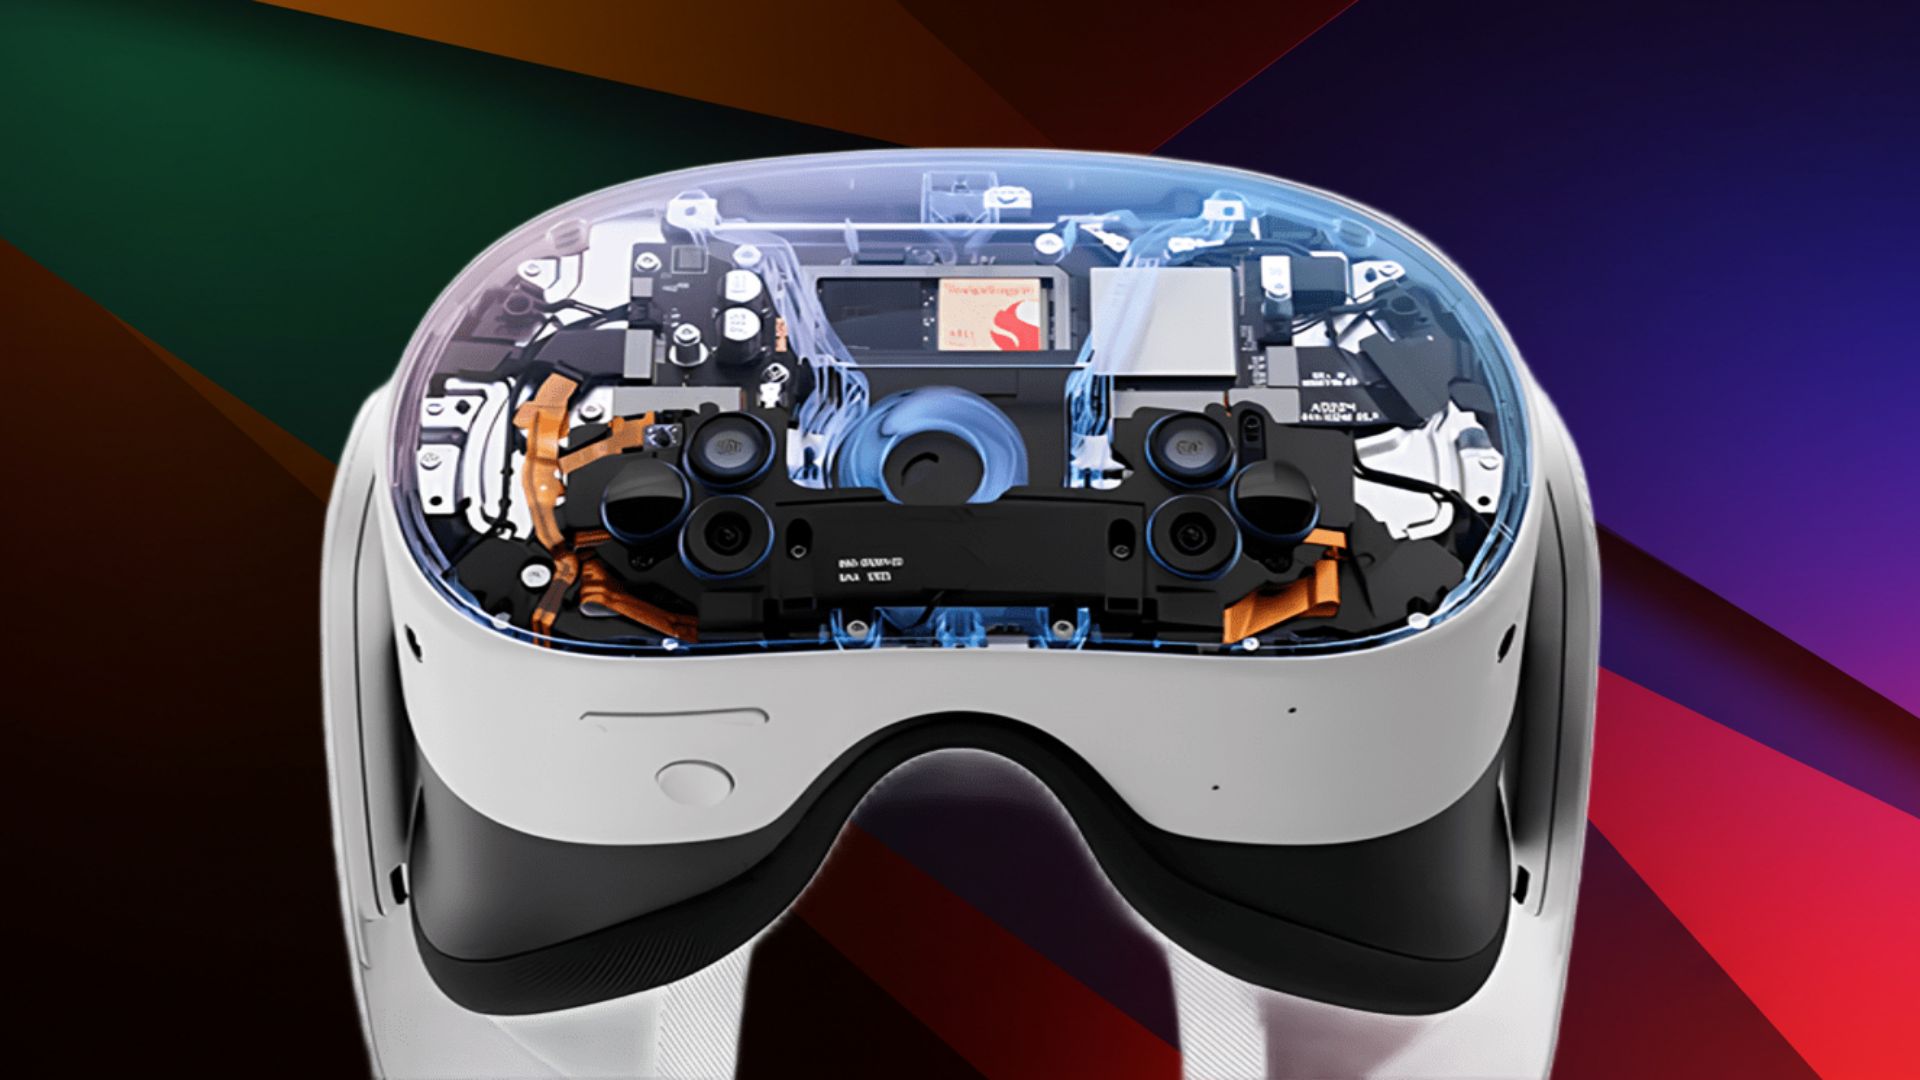
Download the latest Oculus PC installer directly from Meta’s official site and run the setup on Windows 10 or 11. Allow the application to fetch firmware updates, USB drivers, and performance optimizations. After connecting your Quest 3s via a high-quality USB-C or USB 3.2 Gen 1 cable, verify that “Quest 3s” appears without warnings in Device Manager. In the Oculus app’s General settings, enable “Allow Unknown Sources” and “Use USB for Link” to grant third-party applications—such as SteamVR—smooth access to the headset.
Optionally, join the Oculus Beta channel within the app to gain early access to experimental passthrough enhancements and performance tweaks. Contributing feedback on new features helps shape future firmware revisions, ensuring that Quest 3s continues to evolve as a top-tier platform for sim racing enthusiasts.
Integrating SteamVR with Your Racing Sim
For the broadest title compatibility and community content, leverage SteamVR alongside the Oculus PC application. Once your headset is connected via Link, launch SteamVR from within the Oculus interface and confirm that your wheel, pedals, and controllers appear under SteamVR’s Devices panel. Then launch your chosen simulation—Assetto Corsa, iRacing, Project CARS—from the Steam library to access Steam’s overlay, workshop mods, and social features.
Within SteamVR’s application-specific settings, adjust your resolution multipliers and reprojection flags to align with your hardware’s capabilities. In each sim’s VR menu, select the VR profile you previously configured and import your calibrated control settings. This dual-software approach combines Oculus’s low-latency passthrough with Steam’s expansive mod ecosystem, delivering a versatile and highly customizable racing experience.
Wireless Streaming vs. Wired Link
Wireless streaming via Virtual Desktop offers freedom of movement free from cables but introduces compression artifacts and slightly higher latency. To maximize performance, connect your PC via Gigabit Ethernet, position your Quest 3s in proximity to a dedicated 5 GHz Wi-Fi 6 access point, and minimize channel interference. Tweak bitrate and framerate settings in Virtual Desktop to sustain a stable stream above 90 FPS with minimal packet loss.
Conversely, using a certified USB 3.2 Gen 1 or the official Oculus Link cable delivers an uncompressed video feed with the lowest possible latency—crucial for competitive sim racing where every millisecond counts. Though it restricts physical range, a wired Link connection remains the gold standard for consistent, artifact-free visuals and instantaneous input responsiveness under the most demanding racing conditions.
Cockpit Integration and Mounting Techniques
Sturdy Headset Mounting Solutions
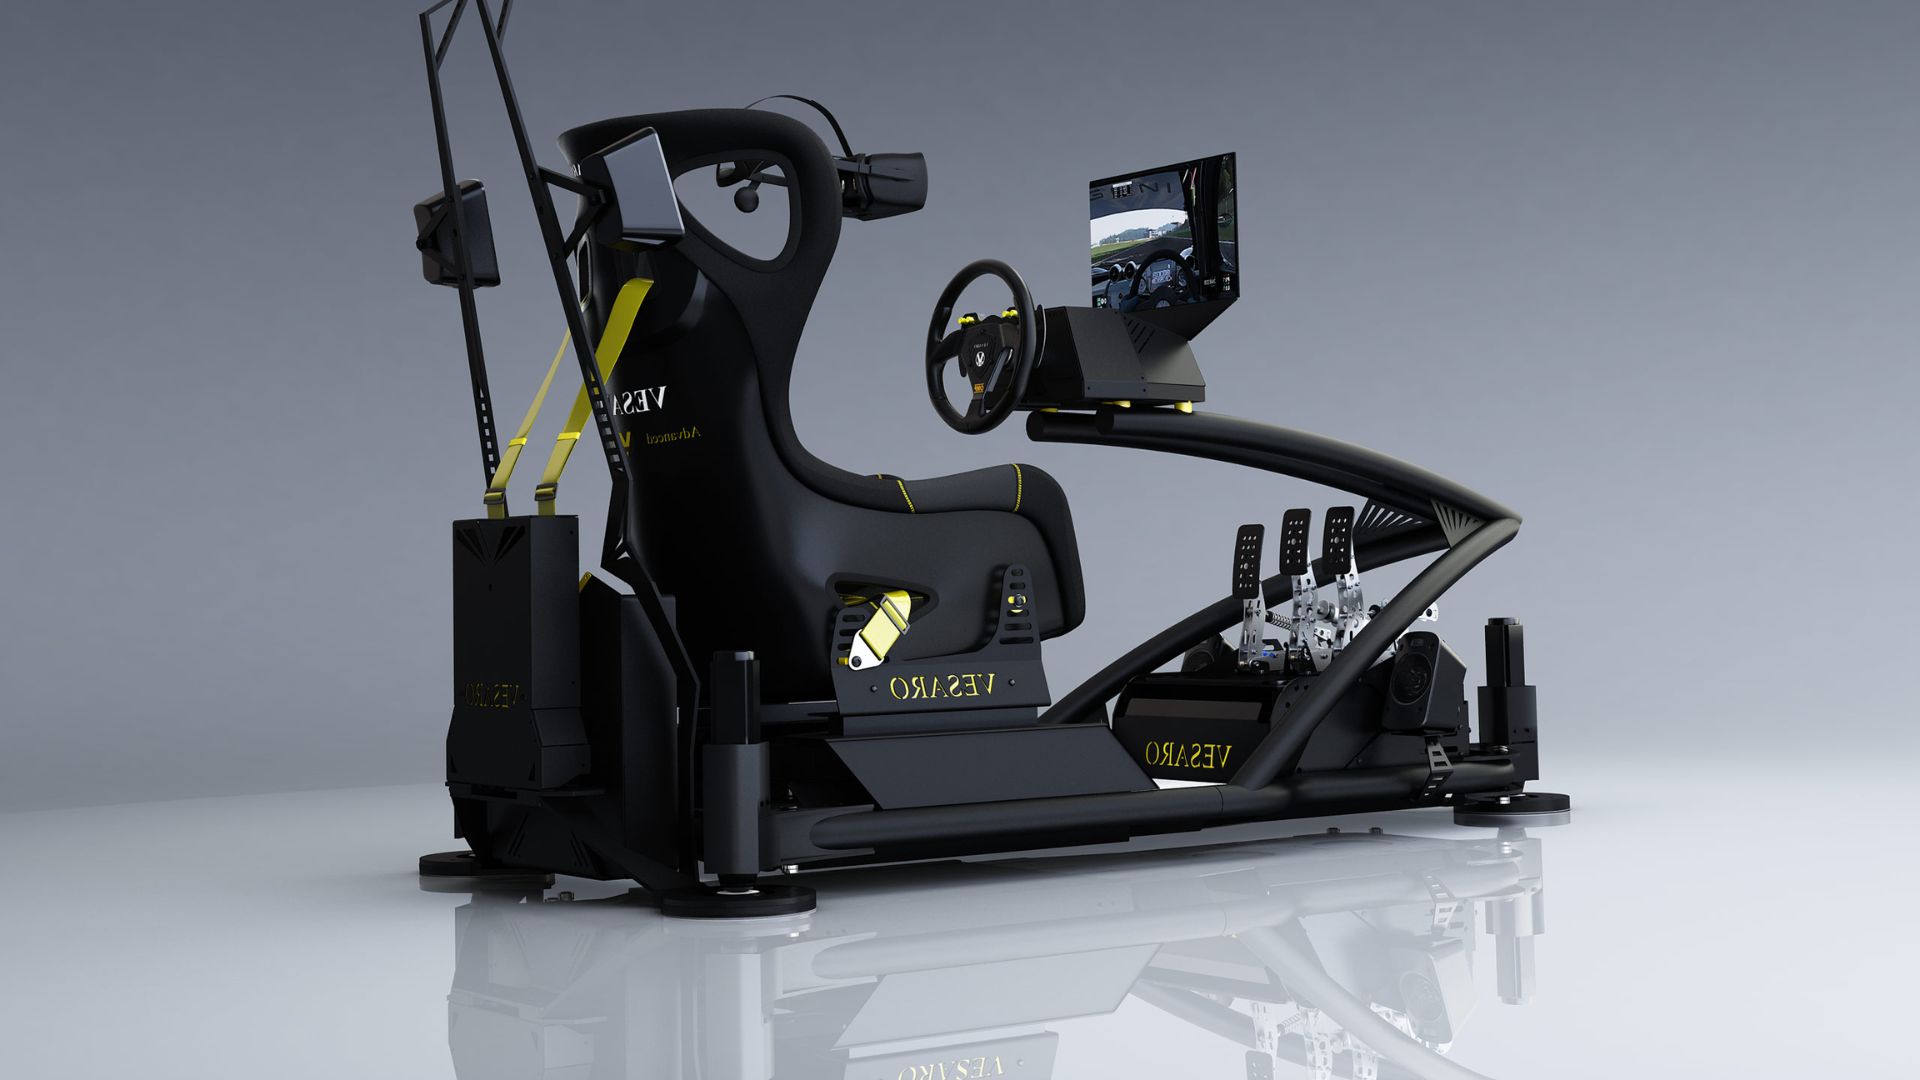
Maintaining a stable headset position is essential for preserving immersion during aggressive maneuvers. Replace the stock halo strap with an aftermarket head harness or clamp-on bracket that secures directly to your rig’s frame. Many sim racing seats and wheel stands—Playseat, Next Level Racing, Trak Racer—offer proprietary VR mounts engineered to resist vibration and flex. This prevents headset wobble, ensuring that your virtual horizon remains aligned with the real-world cockpit, even during rapid head turns.
If you prefer a DIY alternative, fabricate an L-shaped bracket from aluminum extrusion. Line contact points with closed-cell foam and clamp the assembly at eye level on your wheel stand. Confirm that the bracket doesn’t impede full rotation of your wheel or collision with your shifter or handbrake. Proper mounting solutions allow you to quickly attach or detach the Quest 3s for non-racing VR usage without reconfiguring your entire setup.
Aligning Physical and Virtual Origins
Achieving congruence between your real-world controls and the virtual environment requires precise origin alignment. Position the headset’s tracking origin directly over the geometric center of your wheel hub, then measure the eye-to-hub distance with a laser rangefinder or tape measure. In your simulation’s cockpit calibration menu, set the camera height and forward offset to match these real-world measurements, ensuring that steering inputs and head movements correlate exactly with in-game actions.
Eliminate any overhead cables or monitor supports that could collide with the headset during swift head sweeps. Use Velcro straps or cable channels to route essential wires neatly along the rig’s frame, preserving an unobstructed tracking volume and minimizing the risk of mid-session disconnections.
Effective Cable Management for Mobility
A single cable can compromise your freedom of movement if not managed properly. Consider installing a ceiling-mounted pulley system or a retractable spring-loaded reel to suspend your Link cable overhead, allowing it to follow your head instead of restricting it. This solution prevents tangles and accidental yanks that could disrupt your session.
Alternatively, invest in long, flexible USB 3.2 Gen 1 cables with braided sheaths to prevent kinks and electromagnetic interference. Secure any excess cable length behind your seat using cable anchors or zip ties, keeping it out of the way while maintaining stable signal transmission for flawless performance.
Comfort and Immersive Details
Ergonomic Headset Fit and Balance
Prolonged sim racing sessions can strain neck and facial muscles if the headset isn’t balanced optimally. Adjust the top and side straps to distribute the Quest 3s’s weight evenly across your skull, mitigating pressure on the brow and cheekbones. For setups using heavier aftermarket lenses or accessories, attach a small counterweight to the rear strap to offset front-heaviness and maintain a level horizon during rapid glances at mirror or dash elements.
Swap out the stock facial interface for breathable foam or silicone pads designed to wick sweat and reduce friction. Many third-party interfaces include modular spacers for glasses wearers and improved airflow. Take scheduled breaks every 60–90 minutes to relieve ocular strain, perform quick neck stretches, and readjust the fit before continuing your next stint.
High-Fidelity Audio and Spatial Sound
Accurate auditory feedback—engine revs, tire squeal, and environmental cues—plays a pivotal role in sim racing performance. While the Quest 3s’s built-in spatial audio is impressive, dedicated over-ear headphones often deliver superior clarity and bass response. For wired setups, use a USB DAC or the 3.5 mm jack with a high-quality splitter to minimize latency and maintain consistent volume levels across all audio channels.
If you prefer wireless freedom, choose a headset supporting low-latency codecs like aptX LL. Ensure your Bluetooth transmitter is codec-compatible and positioned within line-of-sight of the headset to minimize packet loss. In your sim’s audio menu, balance engine, ambient, and collision volumes so you capture every critical mechanical cue without masking essential driving sounds.
Scheduled Breaks and Physical Well-Being
Extended virtual racing places cognitive and biomechanical demands on your body. Integrate micro-breaks into your routine—pause every 45–60 minutes to stand, stretch, and reset your posture. Focus on neck rotations, shoulder rolls, and wrist stretches to promote circulation, reduce stiffness, and prevent repetitive strain injuries during marathon stints.
Maintain hydration by keeping water within easy reach, as dehydration can impair reaction times and mental focus. Practice deep-breathing exercises during breaks to combat VR-induced ocular fatigue and sustain alertness. By embedding these wellness protocols into your racing schedule, you’ll preserve peak performance and comfort, whether you’re contesting a 24-hour endurance event or pushing for pole position in a sprint race.
Author: Gerald Ferreira
Pioneering the future of immersive experiences in South Africa through expert storytelling, virtual reality innovation, and high-end 360° production.